Too much time trying to make each and every photo absolutely “perfect”? Try my 9-Step Lightroom Editing Workflow for Food Photography.
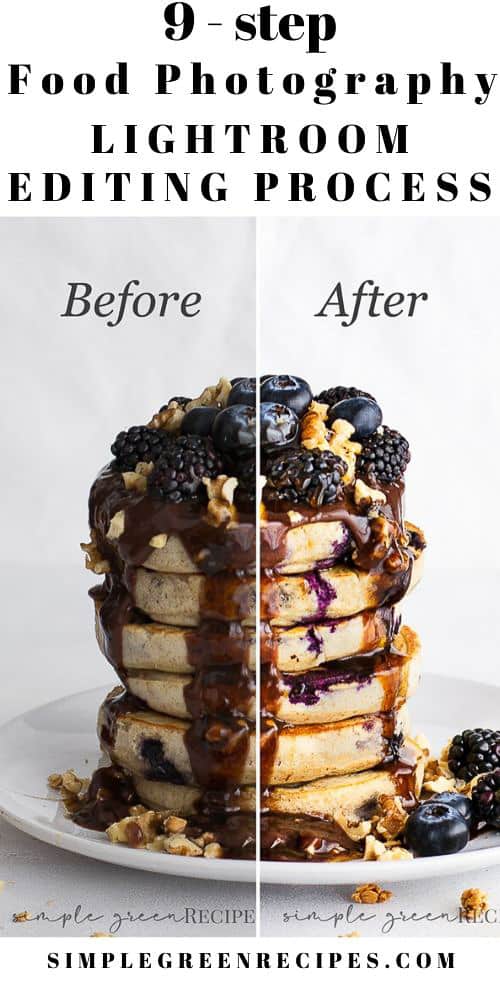
9-Step Lightroom Editing Workflow for Food Photography
Ever wonder why it takes you so long to upload a picture to your Instagram account? Or why publishing a blog post seems to be the neverending story?
I’m quite sure that I know what the problem is. I think you just might be a little too “perfectionist” and you may be spending too much time trying to make each and every photo absolutely “perfect”.
It used to happen to me too, so I decided to create a fast 9-Step Lightroom Editing for Food Photography and stick to it. Becoming more efficient with your time and having a fast post processing photo editing workflow is key for your Instagram account and your blog.
Lightroom is the program most food photographers chose. It’s intuitive and relatively easy to use and offers most of the tools required to make great food photos without investing way to much time on it.
Here, I will share with you how I approach editing my food photography. Try it and feel free to make any adjustment to make it work for you.

9-Step Lightroom Editing Workflow for Food Photography
Step 0: Importing your file
In the LIBRARY module, import your image into Lightroom. And once you have imported your file, go to the DEVELOP module.
Step 1: Cropping
Once in the DEVELOP Module and before you start making any adjustments to your image, crop your picture down so it contains only what you want. To do it, click on the grid symbol under the Histogram in the top panel. I crop it to a certain ratio: 8×10 or square for Instagram.
Step 2: White Balance (WB)
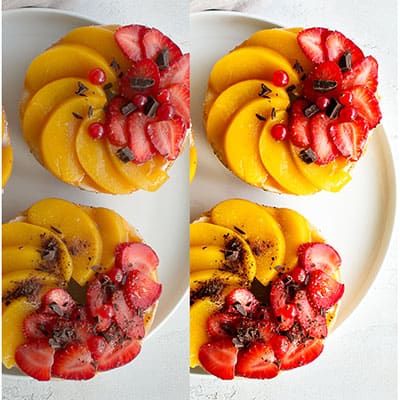
Depending on the light available when shooting or on your camera settings, SOOC Images (straight out of the camera) can be too warm (yellowish) or too cold (bluish). You can correct it by using the eyedropper tool in the Basic Panel. Take the eyedropper tool and click on an area of the image that looks neutral to instantly adjust the white balance. Alternatively, you can also use the “Temperature” slider. If your colors are too yellow, move the slider to the left. Or if there’s a blue hue in your photo, move the slider to the right.
Step 3: Tone settings:
In this section we are going to increase or decrease exposure and contrast in your image.
Exposure: After correcting the WB, I adjust the brightness of the image. Chances are that your image may be too over or under-exposed, but you can easily fix that. Still within the Basic Panel, look for the slider called “Exposure” and move it to the right or left to make your picture brighter or darker.
Contrast: Digital files are usually flat, so you may want to add some contrast between the light and dark colors in your image. If you want a stronger, more dramatic look to your image, move the slider right to up your contrast. This is the quickest way to add some contrast to your image but to tell the truth I no longer use this tool, I feel I lose control over the edition. Instead, I select “Medium Contrast” under Point Curve in the Tone Curve Panel (just below the Basic Panel) and then I make the last Tone adjustments with the next four tools (Highlights, Shadows, Whites and Blacks sliders).
Step 4: Presence settings
Clarity: The clarity slider is the next tool I use. It is similar to a sharpening effect, It adds detail to your image. Don’t overdo it or your food will look dry and unappetizing.
Vibrance: Increases or decreases the color in your image. It adjusts the less saturated tones without over-saturating the ones that are already saturated. Move the slider to the right to slightly boost the subdued colors.
Hope you find my 9-Step Lightroom Editing Workflow for Food Photography Part 1 useful. But, we have not finished yet. Come back soon for Part 2!
If you liked this post don’t forget to Pin and share with your friends!

 Did you try my 9-Step Lightroom Editing Workflow for Food Photography? Tag @simplegreenrecipes on Instagram
More photography tips from Simple Green Recipes:
9-Step Lightroom Editing Workflow for Food Photography (Part 2)


Leave a Comment