Money doesn’t buy happiness but a photography equipment which is the closest to happiness, don’t you think so? A decent photography gear can save you lots of headaches, especially when trying to make the most of your delicious and beautifully styled food.
I don’t mean you need to spend all your saving on the newest, fanciest or most expensive photography gear but certain basic tools will make your photography life easier.

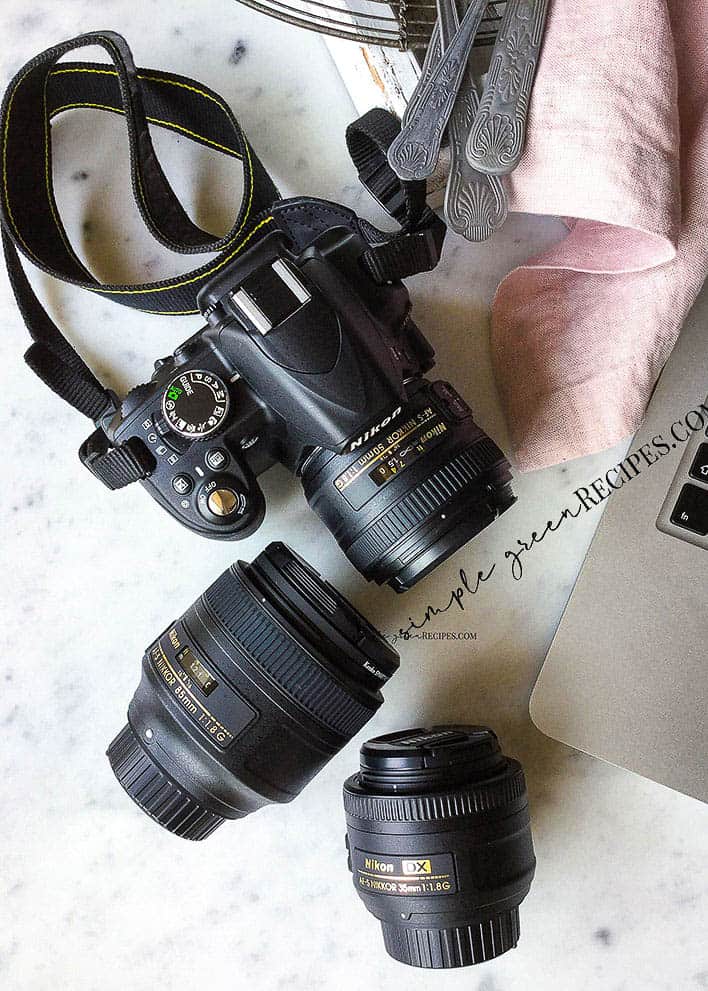
I often get asked what camera I use for my blog and Instagram photos. And to be honest, it is actually very flattering. So I decided to share with you what is in my camera bag so far.
CAMERA
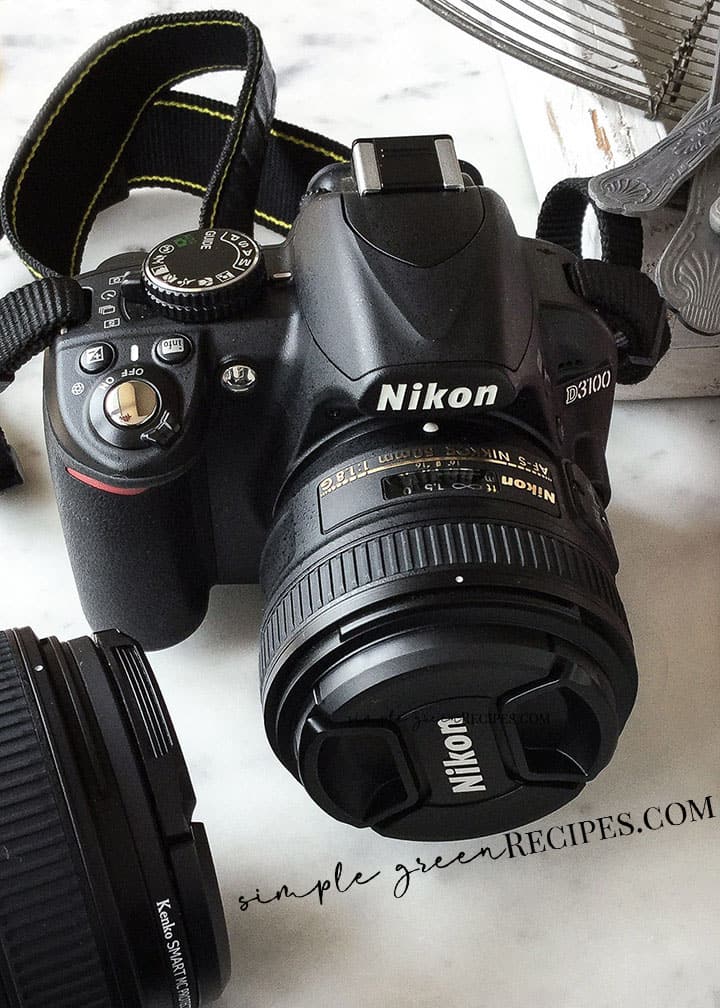
I started out with a Nikon D3100 about 4 years ago, with an 18-55mm kit lens. Can you keep a secret? This isn’t my first blog. I’m still using the same camera and I upgraded my camera some months ago and I currently have a Nikon D5600. I highly recommend buying a DSLR one if aiming to improve your food pictures.
LENSES
I soon realized lenses play a really important role in food photography and though the 18-55mm lens that originally came with the camera was fine at first, it wasn’t bright enough for indoor natural light food photography. So I bought my first prime lens, a 50 mm f/1.8 lens. When people ask me what lens they should get after buying their first camera, I always tell them to buy a 50mm f/1.8 lens because it’s one of the cheapest lens you can buy. It’s light, small and great for low-light conditions.

My second favorite lens is the 35mm f/1.8, a fantastic lens for tabletop photography. I needed a lens that allowed me to capture part of the background along with the subject and tell a complete story. This lens has a slightly wider than “normal” angle of view so it’s perfect for that, especially if you work in a tight space like the small photography studio I set up in my flat. The 35mm can usually get closer than the 50mm lens.
And my third lens, an 85mm f/1.8. I am not going to tell you this is a must for shooting. Many portrait and food photographers shoot mainly with the 50mm lens. Anyway, if you are willing to spend some money on a special lens, the 85mm is for you. This lens is great for compression and bokeh. To make it short, the 85mm tends to make the background appear closer than it is while allowing the subject to really stand out, and you get that creamy background that many photographers desire.
TRIPOD
And last but not least, my Manfrotto Tripod. And this time, I have to tell you this is a must. It’s impossible to get a clear shot without a tripod. When you shoot using a tripod for food photography, not only your image quality will be much better, but you’ll be able to absolutely nail your composition. Once you start shooting with a tripod, you will get addicted to it. So, If you’re even questioning a tripod, get one!
I hope you enjoyed this article about my camera gear. If you have specific questions about the cameras and lenses I’m using, feel free to leave a comment!
I’d love to answer your questions.
More photography resources from Simple Green Recipes:
9-Step Lightroom Editing Workflow for Food Photography (Part 1)

9-Step Lightroom Editing Workflow for Food Photography (Part 2)


Leave a Comment